Exhibit D
Neuronaut
An interactive 3D brain explorer for neuroscience students, with real-time region highlighting, slicing controls, and AI-powered explanations.
- TypeScript
- Next.js
- Three.js
- Python
- FastAPI
- Blender
I’ve always been a visual learner. In most subjects that works fine, but neuroanatomy is a different story because the brain is genuinely hard to picture from a flat diagram. Textbooks give you cross-sections: a slice through the middle, a top-down view, maybe a lateral view with colored labels pointing to different lobes. But a lot of what makes brain anatomy interesting gets lost in that format. The hippocampus curves around itself. The cerebellum tucks underneath and folds in ways a single image can’t capture. When you’re trying to understand how regions connect and where they actually sit relative to each other, 2D doesn’t cut it.
I’m doing a double major in Computer Science and Neuroscience at UBC, so this frustration built up pretty early. I kept reaching for something I could rotate, explore, and actually navigate through. When nothing quite fit what I wanted, I decided to build it.
What Neuronaut is
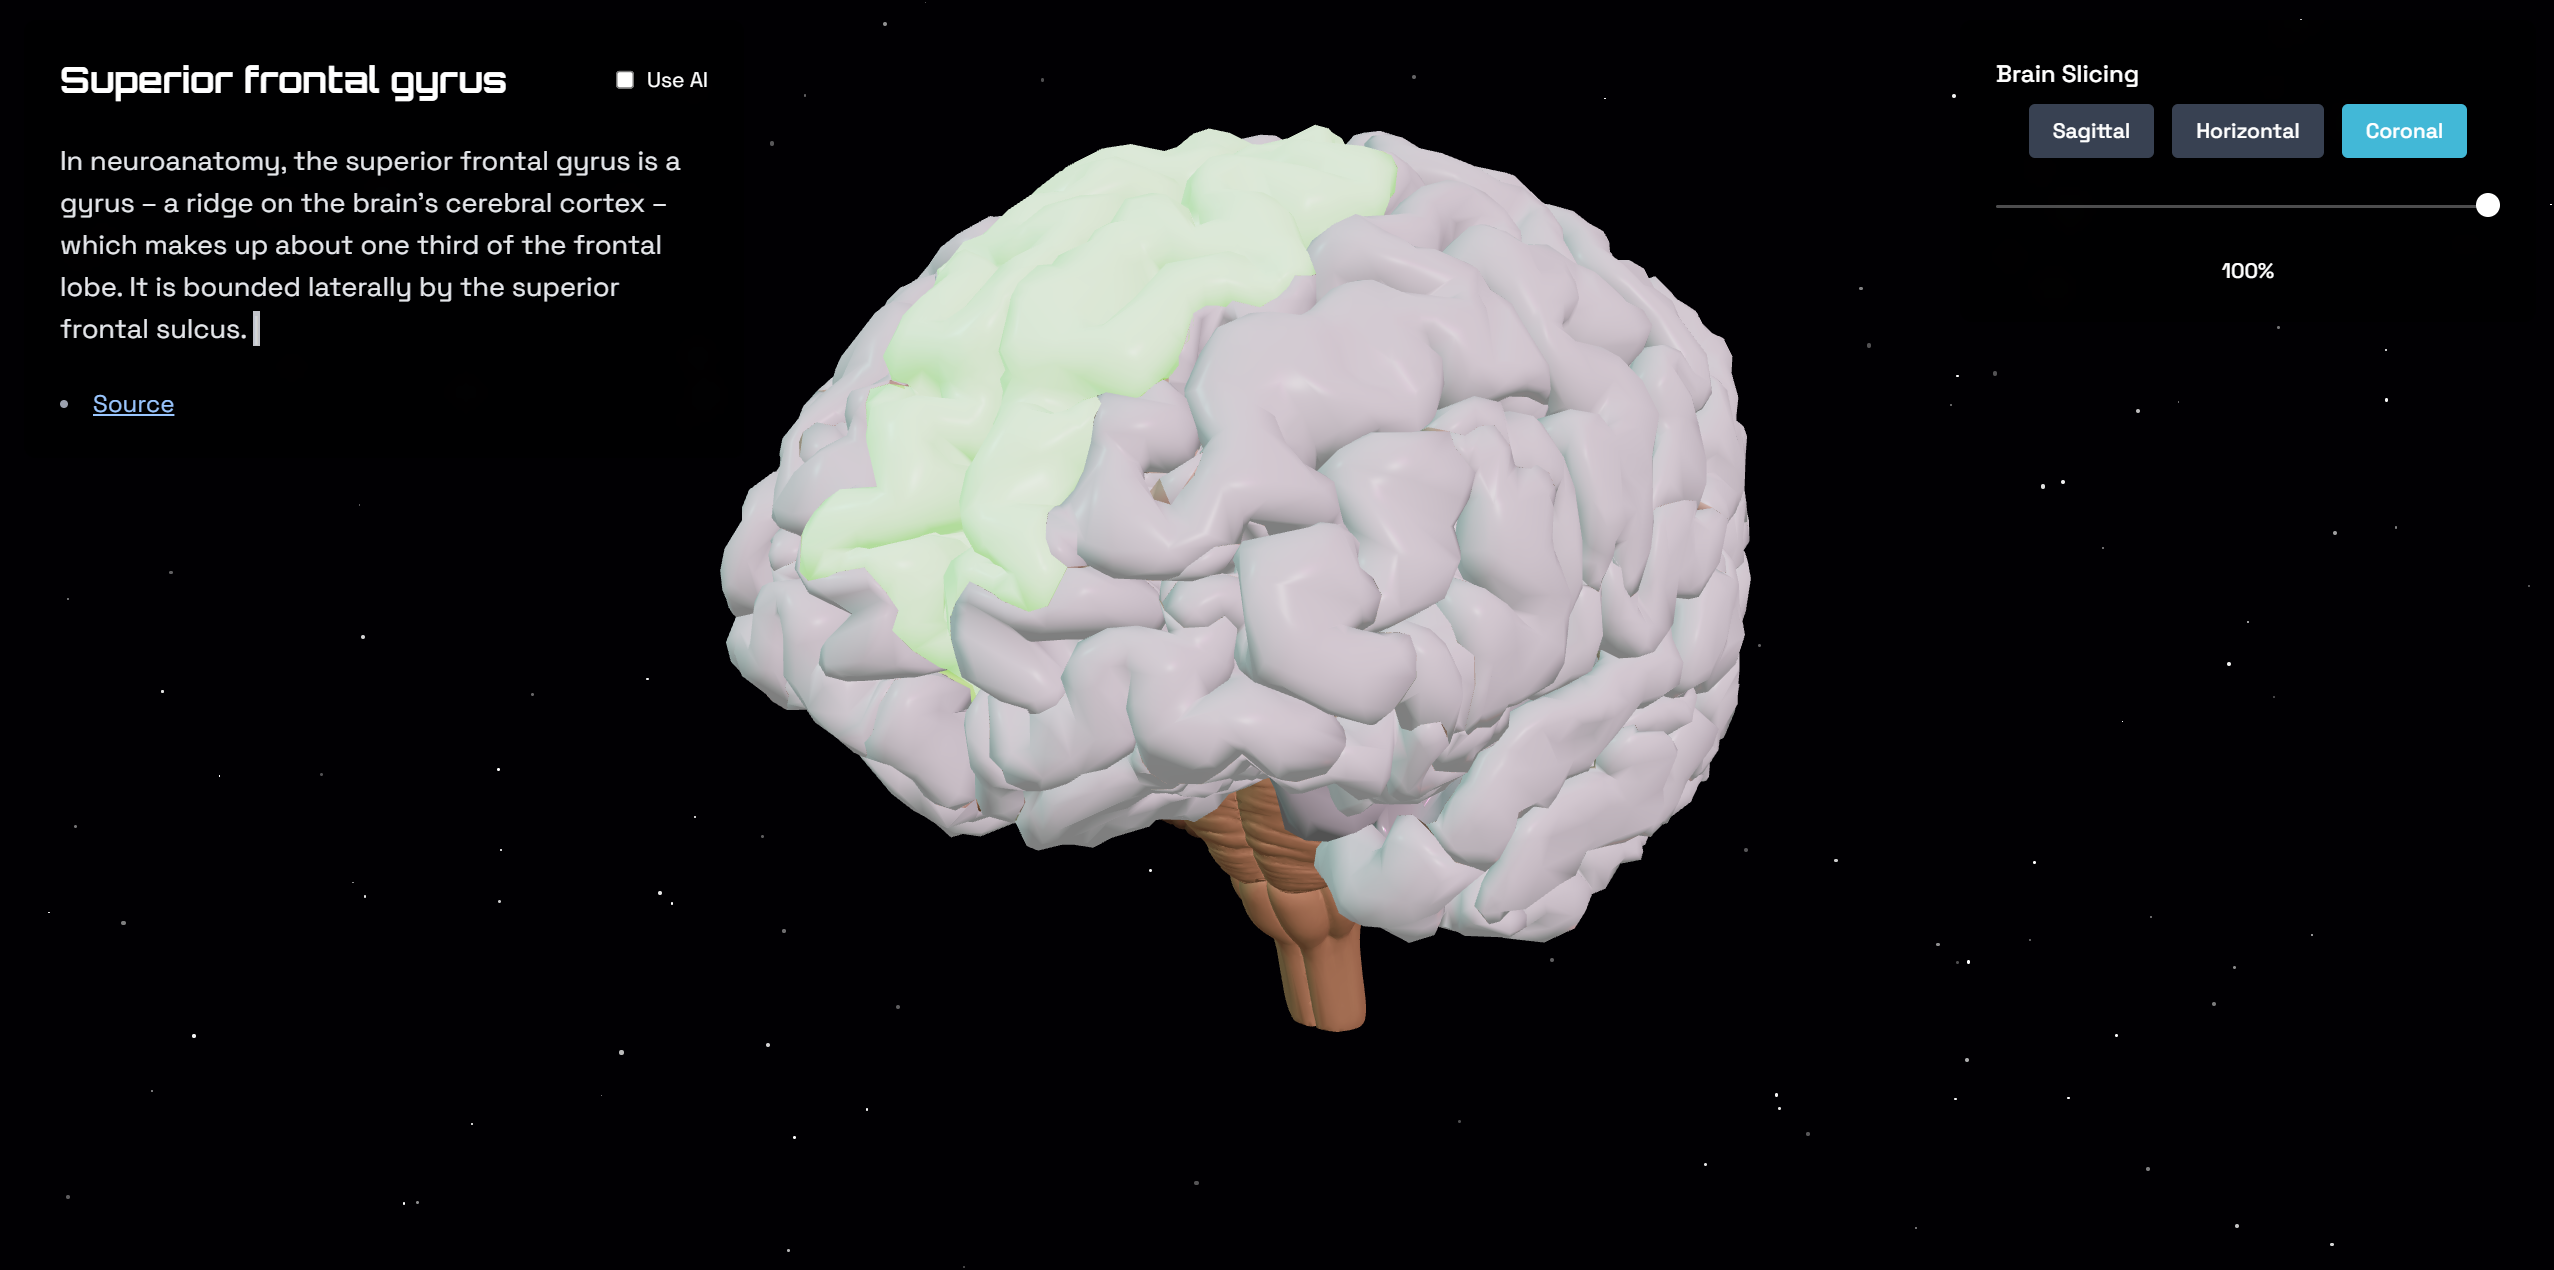
It’s a 3D brain viewer that runs in the browser. You can rotate the model, zoom in, and click on individual brain regions to see what they do. There are slicing controls so you can cut along the sagittal, coronal, or horizontal plane and see inside the model at any depth. When you select a region, a panel shows a plain-English explanation of its function, what happens when it’s damaged, and how it connects to other areas. The whole thing is meant to be something you can open while studying.
Starting in Blender, not in code
Before writing a line of TypeScript, I spent time in Blender preparing the anatomical models. This step matters more than it sounds. For region selection to work, each brain region needs to be its own separate mesh object with a consistent name. You can’t import a single-mesh brain and expect the frontend to figure out which part you clicked.
I segmented the brain into labeled regions: cortex lobes, subcortical structures, cerebellum, brainstem. Each mesh got a name the frontend could map to a label and a description. I also spent time reducing polygon count where possible without losing the shape, since loading a high-resolution anatomical model in a browser uncompressed would be slow.
Getting it running in the browser
The rendering side is built on Three.js, which gives you a WebGL scene without writing raw shader code for everything. Even after the Blender cleanup, the model files were still large, so I ran them through DRACO compression. DRACO is a mesh compression format that Three.js supports natively through a loader, and it brought file sizes down enough that load times and frame rates became acceptable on a normal laptop.
For interaction, Three.js provides orbit controls out of the box, so rotating and zooming the model didn’t take much setup. Region selection was trickier. It works through raycasting: when you click somewhere on the screen, the code fires a ray from the camera through that pixel and checks which mesh it intersects first. That hit tells you what region was clicked, which triggers the highlight and the backend call. The app also supports mobile, which meant making sure the controls and raycasting handled touch events properly.
Slicing through it
One feature I wanted from the start was the ability to slice the brain along the three anatomical planes: sagittal (left-right), coronal (front-back), and horizontal (top-bottom). Each plane gets a slider so you can move the cut anywhere through the model.
This works through clipping planes on the GPU side. A clipping plane tells the renderer to discard any geometry fragment that falls on the wrong side of a defined plane. The reason to do it this way, rather than hiding certain meshes, is that clipping handles partial cuts cleanly. If a mesh straddles the cut line, the GPU clips it exactly at the plane boundary and you get a clean cross-section instead of a half-visible object. Managing three independent clipping planes and updating them in real time as the sliders move took some work to get right.
Adding the explanations
A 3D model you can rotate is useful, but it’s still just a shape viewer without any context around it. The explanation layer is what makes Neuronaut something you can actually learn from.
When you select a region, the frontend sends its name to a FastAPI backend. The backend passes that to an LLM and returns a short explanation of what the region does, what conditions are associated with damage to it, and how it relates to nearby structures. I kept the backend simple on purpose. Its job is to take a region name and return useful text, nothing more.
Looking back
The hardest part of this project was the mesh prep in Blender. Getting clean, properly segmented meshes with consistent naming took longer than expected and is basically invisible in the final product. The shader-based clipping also had a steeper learning curve than I anticipated, mostly because debugging GPU-side behavior is harder than debugging regular code.
What worked well was the DRACO compression step. The performance difference between loading a compressed and uncompressed model in a browser is significant, and it was a relatively small change to the pipeline once I understood how the loader worked.
If I continue on this, the main things I’d add are broader anatomical coverage (the current segmentation is somewhat coarse), better mobile polish, and some kind of study mode where you can quiz yourself on regions. The viewer is in a good place, but there’s a lot of room to make it more useful as an actual learning tool.